
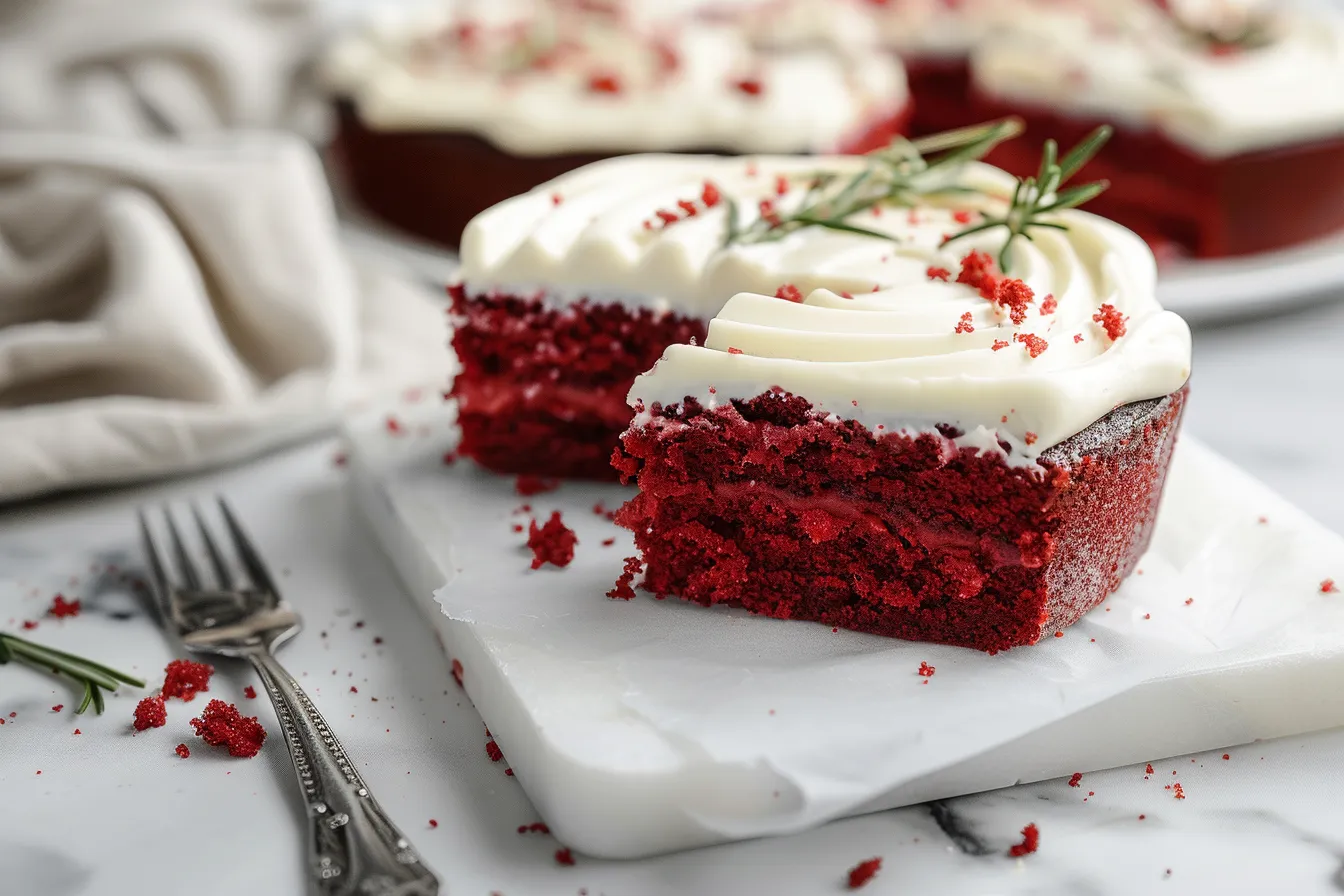
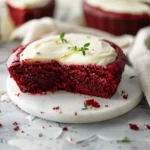
There’s something wonderfully comforting about a slice of Red Velvet cake, isn’t there? I’ve been baking a slightly fancier version for birthdays for years, but sometimes you just need something quick, easy, and satisfying for a Tuesday afternoon treat. That’s where this Red Velvet Snack Cake comes in. It’s the perfect answer to that mid-week slump, a little slice of happiness that’s ready in under an hour. The kids adore it, and honestly, so do I. After countless attempts (some disastrous, I’ll admit!), I’ve finally landed on a recipe that’s foolproof, flavourful, and perfectly moist. Get ready for a cake that’s simple enough for any day but special enough to brighten even the greyest English afternoon.
Why This Recipe Works
This Red Velvet Snack Cake is designed for busy families. It’s a recipe that works because it’s:
- Straightforward: No complicated techniques or equipment needed. Just simple mixing and baking.
- Child-Approved: My two are my harshest critics, and they give this cake a resounding thumbs up (usually with chocolatey smudges around their mouths).
- Uses Everyday Ingredients: You probably have most of what you need in your pantry already.
After more than eight years of cooking for my family, I’ve learned that simple is best. This recipe proves it!
Ingredients
- 225g plain flour
- 25g cocoa powder
- 1 tsp bicarbonate of soda
- ½ tsp baking powder
- ¼ tsp salt
- 115g unsalted butter, softened
- 200g caster sugar
- 2 large eggs
- 1 tsp vanilla extract
- 240ml buttermilk
- 1 tbsp red food colouring (gel or liquid)
- 1 tsp white wine vinegar
Ingredient Notes
Buttermilk: This is crucial for the cake’s moistness and tang. If you don’t have any, you can make a quick substitute by adding 1 tablespoon of lemon juice or white wine vinegar to 240ml of milk and letting it sit for 5 minutes until it curdles slightly.
Red Food Colouring: Gel food colouring gives the most vibrant red, but liquid works too. You can find gel food colouring in most supermarkets in the baking aisle or online.
Cocoa Powder: Use unsweetened cocoa powder for the best flavour. A good quality one will really enhance the red velvet taste.
Step-by-Step Instructions
Step 1: Preheat your oven to 180°C (160°C fan/Gas Mark 4) and grease and flour a 9×13 inch baking tin. This prevents sticking and ensures easy removal of the cake.
Step 2: In a large bowl, whisk together the flour, cocoa powder, bicarbonate of soda, baking powder, and salt. This ensures the dry ingredients are evenly distributed throughout the batter.
Step 3: In a separate bowl, cream together the softened butter and caster sugar until light and fluffy. This step is crucial for creating a light and airy cake. It should take about 3-5 minutes with an electric mixer.
Step 4: Beat in the eggs one at a time, then stir in the vanilla extract. Make sure each egg is fully incorporated before adding the next. This will help prevent the batter from curdling.
Step 5: In a small bowl, combine the buttermilk and red food colouring. This creates the characteristic red hue of the Red Velvet cake.
Step 6: Gradually add the wet ingredients to the dry ingredients, alternating between the buttermilk mixture and the flour mixture, beginning and ending with the flour mixture. Mix until just combined. Be careful not to overmix, as this can result in a tough cake.
Step 7: In a small bowl, whisk together the white wine vinegar and bicarbonate of soda. The mixture will fizz – this is normal! Quickly add it to the batter and stir until just combined. This reaction helps to create a light and fluffy texture.
Step 8: Pour the batter into the prepared tin and spread it evenly.
Step 9: Bake for 25-30 minutes, or until a skewer inserted into the centre comes out clean. Keep a close eye on it after 25 minutes, as ovens can vary.
Step 10: Let the cake cool in the tin for 10 minutes before transferring it to a wire rack to cool completely. Resist the urge to cut into it whilst it’s still warm! It needs time to set properly.
My Kitchen Tips & Tricks
- Don’t Overmix: Overmixing the batter develops the gluten in the flour, resulting in a tough cake. Mix until just combined.
- Room Temperature Ingredients: Using room temperature butter and eggs helps the batter come together smoothly and evenly.
- Buttermilk Substitute: If you don’t have buttermilk, you can use plain yogurt thinned with a little milk or the lemon juice/vinegar trick mentioned earlier.
- Frosting Tip: For a quick and easy frosting, dust the cake with icing sugar or spread with a simple cream cheese frosting. A little goes a long way!
- Child-Friendly Adjustment: My children prefer this cake without frosting, but I sometimes add a sprinkle of chocolate chips on top before baking for a little extra sweetness.
- Prevent a Soggy Bottom: Make sure the cake is completely cool before frosting. Otherwise, the frosting will melt and make the cake soggy.
Storage & Meal Prep
This Red Velvet Snack Cake can be stored at room temperature in an airtight container for up to 3 days. You can also store it in the fridge for up to 5 days, but it may dry out slightly. For longer storage, you can freeze the cake for up to 2 months. Wrap it tightly in cling film and then foil to prevent freezer burn.
To reheat, simply thaw the cake at room temperature. It’s delicious served cold or slightly warmed.
This cake is also great for meal prepping. You can bake it on Sunday and enjoy slices throughout the week. It’s the perfect afternoon treat with a cup of tea.
Substitutions & Variations
Gluten-Free: I haven’t personally tested this recipe with gluten-free flour, but a good quality gluten-free all-purpose blend should work well. You might need to add a little extra liquid to the batter.
Dairy-Free: Use a dairy-free butter substitute and almond milk in place of the buttermilk (with the vinegar or lemon juice added). Be sure to find a dairy-free food colouring as well, as some contain dairy derivatives.
Chocolate Chips: Add a handful of chocolate chips to the batter for a chocolatey twist.
Spices: For a warmer flavour, add ½ teaspoon of ground cinnamon or nutmeg to the batter.
Frequently Asked Questions
Can I prepare this the night before?
Absolutely. In fact, I often do this on Sunday evenings before the busy school week. Simply prepare everything up to the baking stage, cover tightly, and refrigerate. Bring it to room temperature for 15 minutes before cooking, and you’ll save yourself precious morning time.
How do I know when the cake is done?
The best way to tell if the cake is done is to insert a skewer into the centre. If it comes out clean, the cake is ready. If there’s wet batter on the skewer, it needs a little longer in the oven. Also, the top should spring back lightly when touched.
Can I use a different type of food colouring?
Yes, you can use gel or liquid food colouring. Gel food colouring will give you the most vibrant red colour, but liquid food colouring will work too. Just be aware that the colour may not be as intense.
How should I store leftover cake?
Store leftover cake in an airtight container at room temperature for up to 3 days or in the fridge for up to 5 days. You can also freeze it for longer storage.
Will my children like this cake?
Most children adore this cake! The red colour and slightly sweet flavour are usually a hit. My two certainly devour it. You can even let them help with the mixing – it’s a great way to get them involved in the kitchen.
Can I make this into cupcakes?
Yes, you can definitely make this into cupcakes! Fill cupcake liners about 2/3 full and bake for 15-20 minutes, or until a skewer inserted into the centre comes out clean. Keep a close eye on them, as they will bake faster than the cake.
Serving Suggestions
This Red Velvet Snack Cake is delicious on its own with a cup of tea or coffee. You can also dust it with icing sugar for a simple yet elegant presentation. For a more decadent treat, serve it with a dollop of whipped cream or a scoop of vanilla ice cream.
My family typically enjoys this cake as an afternoon snack or a simple dessert after dinner. It’s also great for bringing to picnics or potlucks.
For portion sizes, I usually cut the cake into 12-16 slices. It’s rich, so a small slice is usually enough to satisfy.
And there you have it! My family’s favourite Red Velvet Snack Cake recipe. It’s become a staple in our household, especially when we need a little bit of comfort on a rainy day. It’s not fancy, but it’s honest, delicious, and always brings a smile to our faces.
I really hope you give this recipe a try. If you do, please let me know what you think in the comments below! I always love hearing your honest feedback. And if you’re looking for more simple and delicious family recipes, be sure to browse the rest of FamiliesRecipes.com or join our email community for exclusive content and kitchen tips. Happy baking!
PrintRed Velvet Snack Cake Recipe
Try this delish red velvet snack cake recipe Easy bake dessert Simple tech ingredients for a moist cake Great snack any time 142 chars
- Prep Time: 15 minutes
- Cook Time: 30 minutes
- Total Time: 45 minutes
- Yield: 12-16 slices
- Category: Cake
- Cuisine: American
Ingredients
- 225g plain flour
- 25g cocoa powder
- 1 tsp bicarbonate of soda
- ½ tsp baking powder
- ¼ tsp salt
- 115g unsalted butter, softened
- 200g caster sugar
- 2 large eggs
- 1 tsp vanilla extract
- 240ml buttermilk
- 1 tbsp red food colouring (gel or liquid)
- 1 tsp white wine vinegar
Instructions
- Preheat your oven to 180°C (160°C fan/Gas Mark 4) and grease and flour a 9×13 inch baking tin.
- In a large bowl, whisk together the flour, cocoa powder, bicarbonate of soda, baking powder, and salt.
- In a separate bowl, cream together the softened butter and caster sugar until light and fluffy.
- Beat in the eggs one at a time, then stir in the vanilla extract.
- In a small bowl, combine the buttermilk and red food colouring.
- Gradually add the wet ingredients to the dry ingredients, alternating between the buttermilk mixture and the flour mixture, beginning and ending with the flour mixture. Mix until just combined.
- In a small bowl, whisk together the white wine vinegar and bicarbonate of soda. Quickly add it to the batter and stir until just combined.
- Pour the batter into the prepared tin and spread it evenly.
- Bake for 25-30 minutes, or until a skewer inserted into the centre comes out clean.
- Let the cake cool in the tin for 10 minutes before transferring it to a wire rack to cool completely.