
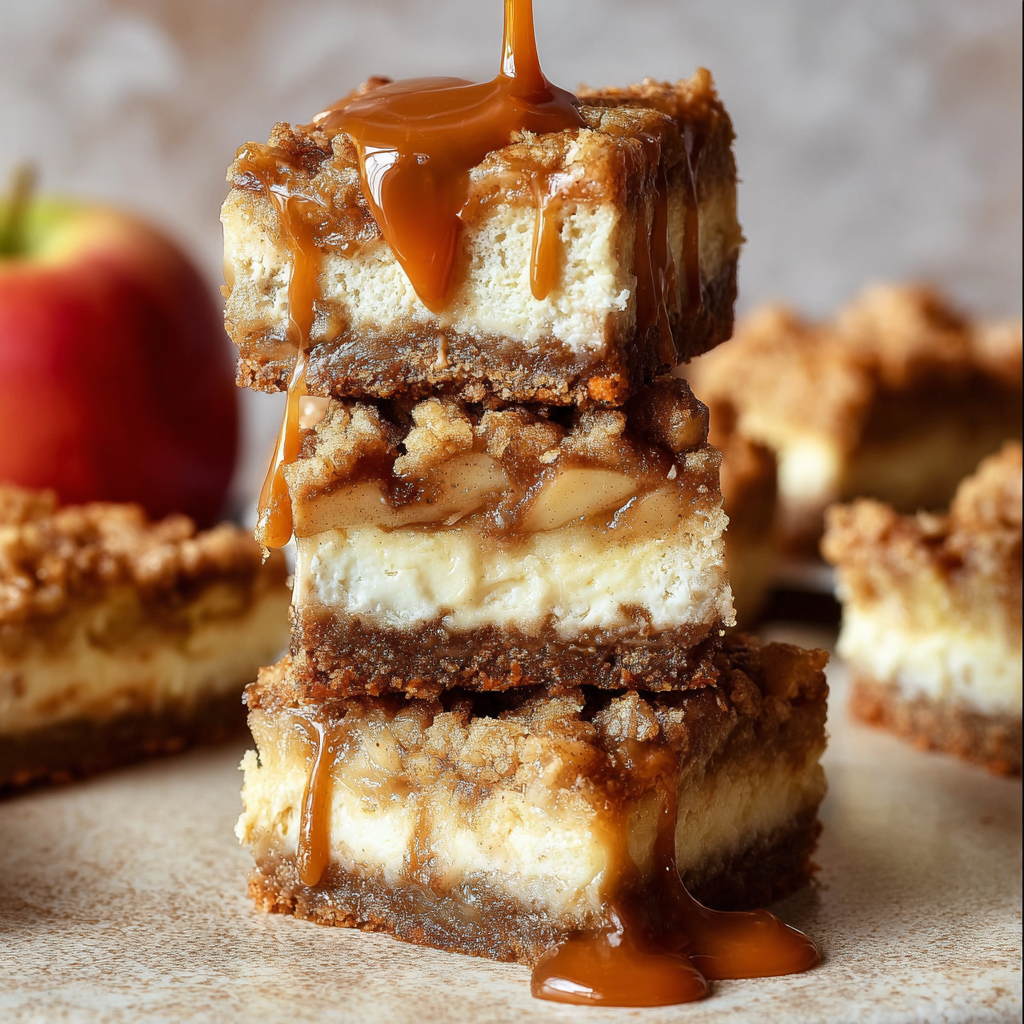
There’s nothing quite like the smell of apples baking in the oven, is there? It conjures up memories of autumn afternoons spent scrumping in the orchard (when I was little, of course!), and cosy evenings by the fire. But let’s be honest, sometimes a whole apple pie feels like a bit too much effort, especially during the whirlwind of school runs and after-school clubs. That’s where these Sweet Apple Crisp Cheesecake Squares come in. They offer all the comfort of apple crisp with the added indulgence of cheesecake, and the portion-controlled squares make them perfect for packed lunches or a quick treat after dinner. I’ve been tweaking this recipe for ages, and after countless batches, I think I’ve finally cracked the perfect balance of sweet, tangy, and utterly delicious. Trust me, these will become a family favourite in no time!
Why This Recipe Works
As a mum of two, I know how precious time is. This recipe is designed to be achievable even on the busiest of days. After 8+ years of home cooking, I’ve learned what works and what doesn’t, and this recipe is a winner for several reasons:
- Simple Method: No complicated techniques required. Just mix, layer, and bake!
- Child-Approved: My two are brutally honest critics, and they absolutely adore these squares. Even my fussy eater asks for seconds!
- Adaptable Ingredients: You can easily substitute ingredients based on what you have on hand or dietary needs.
Ingredients
- For the Crust:
- 150g digestive biscuits, crushed
- 75g unsalted butter, melted
- 25g light brown sugar
- For the Apple Crisp Topping:
- 3 medium apples, peeled, cored, and diced (Granny Smith or Braeburn work well)
- 50g rolled oats
- 50g plain flour
- 50g light brown sugar
- 50g unsalted butter, cold and cubed
- 1 tsp ground cinnamon
- ¼ tsp ground nutmeg
- For the Cheesecake Filling:
- 300g full-fat cream cheese, softened
- 100g caster sugar
- 1 large egg
- 1 tsp vanilla extract
- 2 tbsp double cream
Ingredient Notes
Let’s break down the ingredients a bit. Full-fat cream cheese is essential for that rich, creamy texture we all love in a cheesecake. Using a lower-fat version will result in a less satisfying result. For the apples, I prefer Granny Smith for their tartness, which balances the sweetness of the other components. Braeburns are also a good choice. You can usually find all of these ingredients at your local Tesco or Sainsbury’s. If you’re looking to save a bit of money, own-brand digestive biscuits work just as well as the more expensive brands.
Step-by-Step Instructions
Let’s get baking!
- Prepare the Crust: In a medium bowl, combine the crushed digestive biscuits, melted butter, and brown sugar. Press the mixture firmly into the bottom of a lined 20cm (8-inch) square baking tin. I find using the bottom of a measuring cup helps to get a nice, even layer.
- Make the Apple Crisp Topping: In another bowl, combine the diced apples, rolled oats, flour, brown sugar, cinnamon, and nutmeg. Add the cold, cubed butter and use your fingertips (or a pastry blender) to rub the butter into the dry ingredients until the mixture resembles coarse crumbs.
- Prepare the Cheesecake Filling: In a large bowl, beat the softened cream cheese and caster sugar together until smooth and creamy. Add the egg and vanilla extract and mix until just combined. Be careful not to overmix at this stage, as it can cause cracks in the cheesecake. Stir in the double cream.
- Assemble and Bake: Pour the cheesecake filling over the biscuit base. Sprinkle the apple crisp topping evenly over the cheesecake filling. Bake in a preheated oven at 180°C (160°C fan/Gas Mark 4) for 30-35 minutes, or until the topping is golden brown and the cheesecake filling is set but still has a slight wobble in the centre. Through trial and error, I’ve learned that a slight wobble is key – it will firm up as it cools.
- Cool and Chill: Remove the baking tin from the oven and let it cool completely at room temperature. Once cooled, cover and chill in the fridge for at least 4 hours, or preferably overnight. This allows the cheesecake to fully set and the flavours to meld together beautifully.
- Cut and Serve: Once chilled, carefully lift the cheesecake from the baking tin using the parchment paper lining. Cut into squares and serve. A dollop of whipped cream or a scoop of vanilla ice cream is the perfect finishing touch, but they are also delicious on their own.
My Kitchen Tips & Tricks
Over the years, I’ve picked up a few tricks to make this recipe even easier and more delicious:
- Prevent a Soggy Crust: To prevent the biscuit base from becoming soggy, you can pre-bake it for 8-10 minutes before adding the cheesecake filling.
- Soften Cream Cheese Quickly: If you’re short on time, you can soften cream cheese quickly by unwrapping it and microwaving it in 15-second intervals until it’s soft.
- Child-Friendly Adjustment: My children prefer a smoother apple topping, so I sometimes pulse the apple mixture in a food processor for a few seconds before sprinkling it over the cheesecake.
- Make-Ahead Tip: These cheesecake squares are perfect for making ahead. You can prepare the entire recipe up to 2 days in advance and store it in the fridge until ready to serve.
- Budget-Conscious Tip: Use seasonal apples for the most affordable option. If apples are particularly expensive, you could even substitute them with other fruits like pears or plums.
- Troubleshooting Tip: If the topping is browning too quickly, cover the baking tin loosely with foil for the last 10-15 minutes of baking.
Storage & Meal Prep
These Sweet Apple Crisp Cheesecake Squares are ideal for prepping ahead and storing for later.
- Storage: Store leftover cheesecake squares in an airtight container in the fridge for up to 3 days.
- Freezing: You can also freeze them for up to 2 months. Wrap each square individually in cling film and then place them in a freezer-safe container. Thaw overnight in the fridge before serving.
- Reheating: They are best served cold, straight from the fridge.
- Make-Ahead: As mentioned before, you can make the entire cheesecake up to 2 days in advance. This is especially handy when you’re expecting guests or need a dessert for a potluck.
Substitutions & Variations
Don’t be afraid to experiment with this recipe! Here are a few substitutions and variations I’ve tried:
- Gluten-Free: Use gluten-free digestive biscuits and gluten-free plain flour. I’ve tried this, and it works perfectly.
- Dairy-Free: I haven’t personally tested a fully dairy-free version, but you could try using a dairy-free cream cheese alternative and substituting the butter with a dairy-free spread.
- Seasonal Variations: In the autumn, try adding a tablespoon of maple syrup to the cheesecake filling for a warming flavour. In the summer, use berries instead of apples for a summery twist.
- Spice it up: Add a pinch of ground ginger to the apple crisp topping for an extra layer of flavour.

Frequently Asked Questions
Can I prepare this the night before?
Absolutely. In fact, I often do this on Sunday evenings before the busy school week. Simply prepare everything, cover tightly, and refrigerate. This allows the flavors to meld together, and the cheesecake is perfectly chilled for serving the next day.
How do I know when it’s done?
The apple crisp topping should be golden brown, and the cheesecake filling should be set around the edges but still have a slight wobble in the center. It will continue to set as it cools.
Can I use a different type of apple?
Yes, you can. I prefer Granny Smith or Braeburn for their tartness, but other varieties like Honeycrisp or Gala will also work well. Just be sure to adjust the amount of sugar accordingly, depending on the sweetness of the apples.
How do I store leftovers properly?
Store leftover cheesecake squares in an airtight container in the refrigerator for up to 3 days. This will keep them fresh and prevent them from drying out.
Will my children enjoy this recipe?
In my experience, most children absolutely love this recipe! The combination of sweet apples, crunchy topping, and creamy cheesecake is a winning combination. My two certainly can’t get enough of them!
Can I scale this recipe for a larger or smaller family?
Yes, you can easily scale this recipe up or down. To make a larger batch, simply double or triple the ingredients and use a larger baking tin. To make a smaller batch, halve the ingredients and use a smaller tin.
Why did my cheesecake crack?
Cheesecakes crack when they are baked at too high a temperature or are overbaked. Ensure your oven is set to the correct temperature, and avoid overbaking the cheesecake. A slight wobble in the centre is perfectly normal and indicates that it is done.
Serving Suggestions
These Sweet Apple Crisp Cheesecake Squares are delicious on their own, but here are a few serving suggestions to elevate them even further:
- A dollop of whipped cream or a scoop of vanilla ice cream.
- A drizzle of caramel sauce or a sprinkle of chopped nuts.
- A warm cup of tea or coffee.
These squares are perfect for a quick dessert after dinner, a treat in packed lunches, or a showstopping addition to a buffet table. My family typically enjoys them with a cuppa in the afternoon or as a special treat on the weekends.
I truly hope you give these Sweet Apple Crisp Cheesecake Squares a try. They’re a comforting and delicious treat that fits perfectly into busy family life. After all, sometimes the simplest things are the most satisfying. Don’t forget to let me know what you think in the comments below – I always love hearing your honest feedback! And if you’re looking for more easy and delicious family recipes, be sure to browse the rest of FamiliesRecipes.com or join my email community for exclusive content and inspiration. Happy baking!
PrintApple Crisp Cheesecake Squares

Apple crisp cheesecake squares Delightful sweet treats blend apple crisp cheesecake into easy squares Perfect dessert recipe baking tech
- Prep Time: 20 minutes
- Cook Time: 35 minutes
- Total Time: 55 minutes
- Yield: 16
- Category: Dessert
- Cuisine: American
Ingredients
- 150g digestive biscuits, crushed
- 75g unsalted butter, melted
- 25g light brown sugar
- 3 medium apples, peeled, cored, and diced (Granny Smith or Braeburn)
- 50g rolled oats
- 50g plain flour
- 50g light brown sugar
- 50g unsalted butter, cold and cubed
- 1 tsp ground cinnamon
- ¼ tsp ground nutmeg
- 300g full-fat cream cheese, softened
- 100g caster sugar
- 1 large egg
- 1 tsp vanilla extract
- 2 tbsp double cream
Instructions
- Prepare the Crust: In a medium bowl, combine the crushed digestive biscuits, melted butter, and brown sugar. Press the mixture firmly into the bottom of a lined 20cm (8-inch) square baking tin.
- Make the Apple Crisp Topping: In another bowl, combine the diced apples, rolled oats, flour, brown sugar, cinnamon, and nutmeg. Add the cold, cubed butter and use your fingertips (or a pastry blender) to rub the butter into the dry ingredients until the mixture resembles coarse crumbs.
- Prepare the Cheesecake Filling: In a large bowl, beat the softened cream cheese and caster sugar together until smooth and creamy. Add the egg and vanilla extract and mix until just combined. Stir in the double cream.
- Assemble and Bake: Pour the cheesecake filling over the biscuit base. Sprinkle the apple crisp topping evenly over the cheesecake filling. Bake in a preheated oven at 180°C (160°C fan/Gas Mark 4) for 30-35 minutes, or until the topping is golden brown and the cheesecake filling is set but still has a slight wobble in the centre.
- Cool and Chill: Remove the baking tin from the oven and let it cool completely at room temperature. Once cooled, cover and chill in the fridge for at least 4 hours, or preferably overnight.
- Cut and Serve: Once chilled, carefully lift the cheesecake from the baking tin using the parchment paper lining. Cut into squares and serve.