
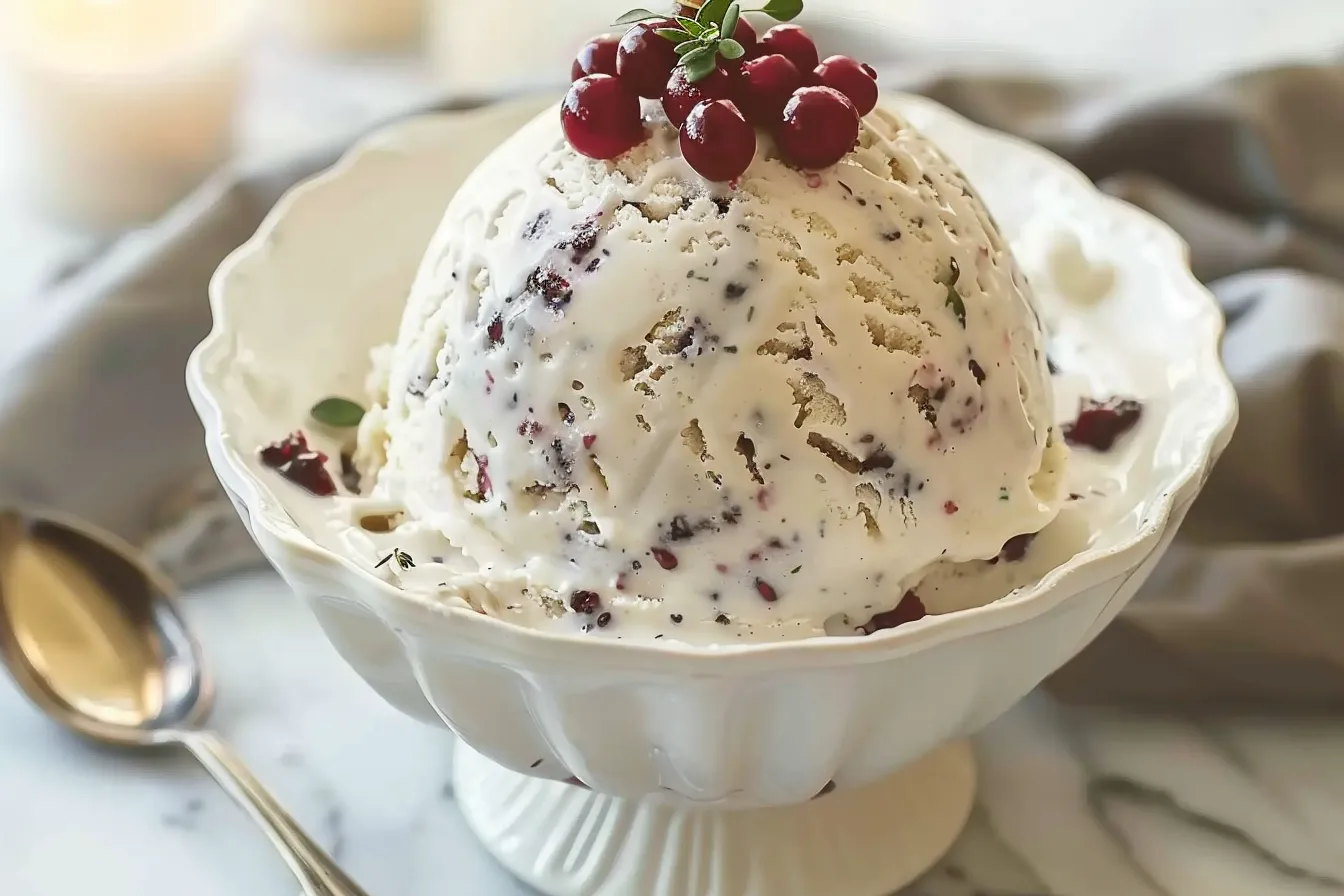
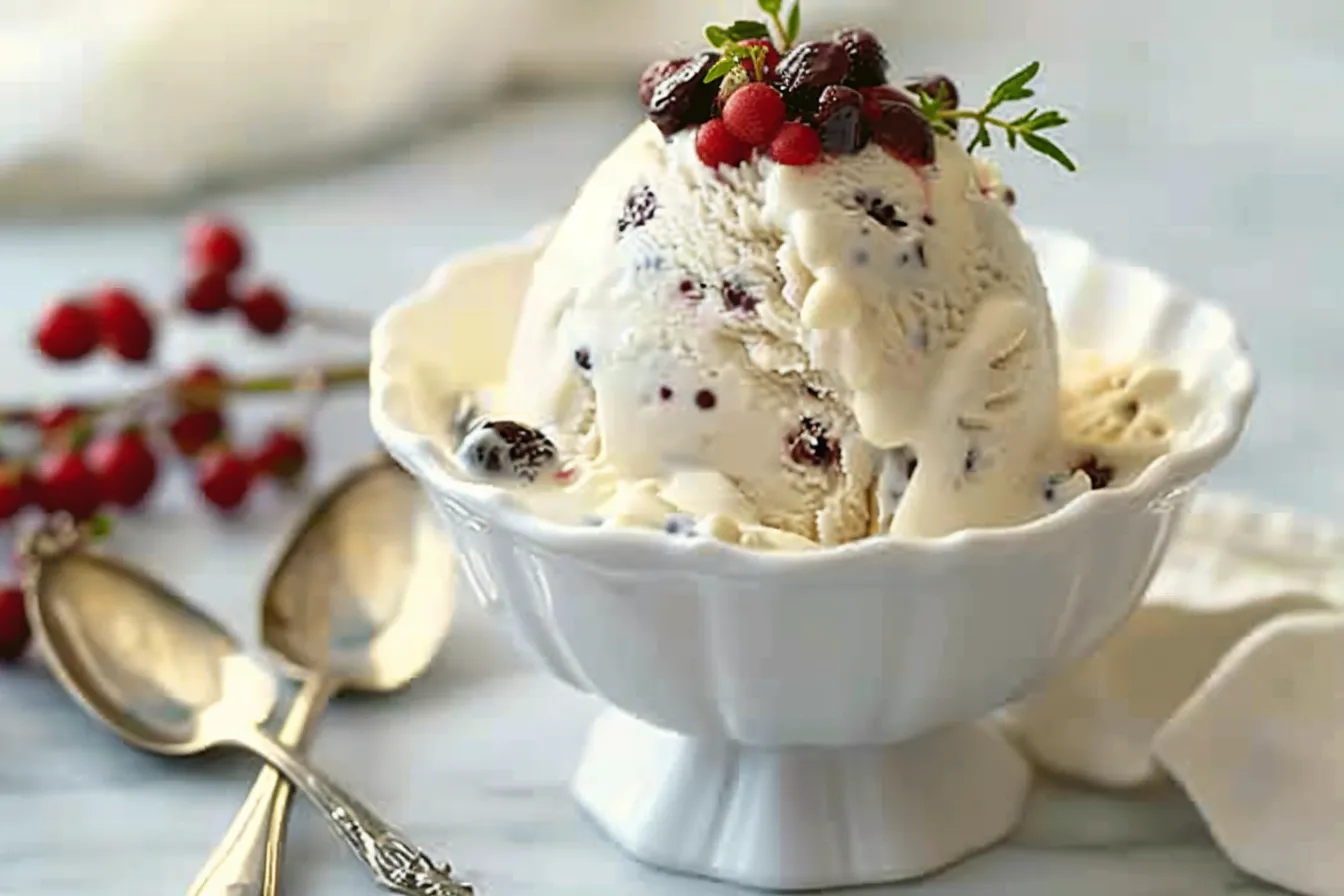
Christmas pudding, that wonderfully boozy, fruity delight, is a staple in our house over the festive period. But let’s be honest, there’s often some leftover! Instead of letting it languish at the back of the fridge, I’ve been making this incredible Christmas pudding ice cream for years. It’s a brilliant way to use up the pudding and creates a truly spectacular festive treat that even my fussy little ones, Harry and Amelia, adore. They declared it “way better than shop-bought” – high praise indeed! Trust me, this recipe is a guaranteed hit, and it’s easier than you might think. Get ready to impress everyone with this unique and delicious ice cream!
Why This Recipe Works
As a busy mum of two, I need recipes that are quick, easy, and reliable. This Christmas pudding ice cream ticks all the boxes. It’s a fantastic way to transform leftover Christmas pudding into something truly special. After years of tinkering, I’ve nailed a recipe that’s:
- Straightforward: Minimal steps and fuss-free instructions.
- Child-Approved: My children genuinely love it, and they are my harshest critics!
- Uses Everyday Ingredients: Besides the Christmas pudding, everything else is likely already in your fridge or pantry.
- A Brilliant Twist: Takes a traditional dessert and gives it a modern, refreshing spin.
The biggest challenge I faced was getting the right balance of pudding to cream. Too much pudding, and it’s dense and heavy; too little, and you lose the flavour. This recipe strikes the perfect balance!
Ingredients
- 300g leftover Christmas pudding, roughly crumbled
- 300ml double cream
- 200ml full-fat milk
- 100g caster sugar
- 1 tsp mixed spice
- 1 tbsp dark rum (optional, but highly recommended!)
Ingredient Notes
Christmas Pudding: Any leftover Christmas pudding will work, whether homemade or shop-bought. Just make sure it’s nicely crumbled. If your pudding is very dry, you might want to add an extra splash of rum to moisten it.
Double Cream: Essential for a rich and creamy ice cream. Don’t skimp on this!
Full-Fat Milk: Using full-fat milk contributes to the creamy texture.
Caster Sugar: Dissolves easily, giving a smooth texture. Granulated sugar can be used in a pinch, but make sure it dissolves completely.
Mixed Spice: Enhances the festive flavour. If you don’t have mixed spice, you can use a combination of cinnamon, nutmeg, and cloves.
Dark Rum: This really elevates the flavour, but it’s optional, especially if you’re serving it to children. You can substitute with a tablespoon of orange juice for a non-alcoholic version.
Step-by-Step Instructions
- Step 1: Prepare the Pudding: Crumble the leftover Christmas pudding into a large bowl. Make sure there are no large lumps. A fork works perfectly for this.
- Step 2: Heat the Cream and Milk: In a saucepan, combine the double cream, full-fat milk, and caster sugar. Gently heat over medium heat, stirring constantly until the sugar has dissolved. Do not boil! You just want it warm enough for the sugar to melt.
- Step 3: Infuse the Flavours: Add the mixed spice and dark rum (if using) to the warm cream mixture. Stir well to combine. The aroma at this point is just divine!
- Step 4: Combine and Blend: Pour the warm cream mixture over the crumbled Christmas pudding. Use an immersion blender (or a regular blender) to blend until smooth. You want a nice, even consistency. Be careful not to over-blend, as this can make the mixture too thick.
- Step 5: Chill Thoroughly: Cover the mixture and refrigerate for at least 4 hours, or preferably overnight. This allows the flavours to meld together and the mixture to cool completely. This step is crucial for getting a smooth ice cream texture.
- Step 6: Churn the Ice Cream: Pour the chilled mixture into your ice cream maker and churn according to the manufacturer’s instructions. This usually takes about 20-30 minutes. You’ll know it’s ready when it has a soft-serve consistency.
- Step 7: Freeze and Enjoy: Transfer the churned ice cream to a freezer-safe container and freeze for at least 2 hours to harden. This will give it a scoopable texture. Scoop and serve!
My Kitchen Tips & Tricks
- Don’t Skip the Chilling Time: This is crucial for preventing ice crystals and ensuring a smooth, creamy texture. Trust me, it’s worth the wait!
- Taste Test and Adjust: Before churning, taste the mixture and adjust the sweetness or spice level to your liking. A little extra rum never hurt anyone (unless the kids are having it!).
- Prevent Ice Crystals: Adding a tablespoon of vodka to the mixture before freezing can help prevent ice crystals from forming. However, be mindful of serving it to children.
- Child-Friendly Adjustment: My daughter, Amelia, isn’t keen on strong rum flavours. I sometimes make a separate batch just for her with a splash of orange juice instead.
- Make-Ahead Strategy: The mixture can be prepared up to 2 days in advance and stored in the fridge until ready to churn.
- Serving Suggestion: Serve with a sprinkle of chopped nuts or a drizzle of caramel sauce for an extra special treat.
- Troubleshooting: If your ice cream is too hard, let it sit at room temperature for 5-10 minutes before scooping. If it’s too soft, freeze for an additional hour.
Storage & Meal Prep
This Christmas pudding ice cream can be stored in an airtight container in the freezer for up to 2 weeks. For the best texture, let it soften slightly at room temperature for about 5-10 minutes before serving.
You can easily make the ice cream mixture a day or two in advance. Just store it in the fridge until you’re ready to churn it. Batch cooking is also a great option if you’re catering for a larger group. Simply double or triple the recipe as needed.
Substitutions & Variations
Want to adapt this recipe? Here are a few ideas:
- Dairy-Free: I haven’t personally tested it, but you could try using coconut cream and almond milk for a dairy-free version. The flavour will be different, but still delicious.
- Gluten-Free: Ensure your Christmas pudding is gluten-free. Many shop-bought versions are, but always double-check the label.
- Spice It Up: For a spicier kick, add a pinch of cayenne pepper or a dash of ginger liqueur.
- Nutty Delight: Mix in some chopped walnuts or pecans for added texture and flavour.
Frequently Asked Questions
Can I make this without an ice cream maker?
Whilst an ice cream maker produces the best results, you can still make this ice cream without one. Pour the mixture into a freezer-safe container and freeze for 2-3 hours, then take it out and whisk it thoroughly to break up any ice crystals. Repeat this process every 30 minutes for the next 2-3 hours until it reaches a scoopable consistency. It requires a bit more effort, but it’s definitely doable!
How do I know when the ice cream is ready in the ice cream maker?
The ice cream is ready when it has a soft-serve consistency. It should be thick and creamy but still slightly soft. It will firm up further in the freezer.
Can I use a different type of alcohol?
Absolutely! Brandy or whisky would also work well in this recipe, adding a slightly different flavour profile. Experiment and see what you prefer!
My ice cream is too hard to scoop, what should I do?
Let it sit at room temperature for 5-10 minutes before scooping. This will soften it slightly and make it easier to serve.
Is this recipe suitable for children?
Yes, but you may want to omit the rum or substitute it with orange juice. My children love it without the rum, and it’s still packed with festive flavour.
Can I add other ingredients to the ice cream?
Of course! Chopped candied peel, glacé cherries, or chocolate chips would all be delicious additions. Get creative and make it your own!
How long will this ice cream last in the freezer?
It will last for up to 2 weeks in an airtight container in the freezer. However, it’s unlikely to last that long – it’s usually devoured much quicker in our house!
Serving Suggestions
This Christmas pudding ice cream is delicious on its own, but it also pairs beautifully with other festive treats. Try serving it alongside:
- Mince pies
- Christmas cake
- Warm apple crumble
For a simple presentation, scoop the ice cream into bowls and garnish with a sprinkle of chopped nuts or a drizzle of caramel sauce. A sprig of holly (remove before eating!) adds a festive touch.
A generous scoop is perfect for adults, whilst a smaller portion is ideal for children. My family loves to enjoy this ice cream whilst watching a Christmas movie – it’s the perfect festive treat!
So there you have it – my family’s favourite way to use up leftover Christmas pudding. It’s a simple, delicious, and truly festive treat that’s sure to impress. I hope you and your family enjoy it as much as we do. Do let me know in the comments what you think, and if you have any brilliant variations of your own!
PrintChristmas Pudding Ice Cream
Festive holiday treat Christmas pudding ice cream recipe Delicious easy ice cream Perfect dessert Try this Xmas pudding tech today
- Prep Time: 15 minutes
- Cook Time: 30 minutes
- Total Time: 45 minutes
- Yield: 6 servings
- Category: Dessert
- Cuisine: British
Ingredients
- 300g leftover Christmas pudding, roughly crumbled
- 300ml double cream
- 200ml full-fat milk
- 100g caster sugar
- 1 tsp mixed spice
- 1 tbsp dark rum (optional, but highly recommended!)
Instructions
- Prepare the Pudding: Crumble the leftover Christmas pudding into a large bowl. Make sure there are no large lumps. A fork works perfectly for this.
- Heat the Cream and Milk: In a saucepan, combine the double cream, full-fat milk, and caster sugar. Gently heat over medium heat, stirring constantly until the sugar has dissolved. Do not boil! You just want it warm enough for the sugar to melt.
- Infuse the Flavours: Add the mixed spice and dark rum (if using) to the warm cream mixture. Stir well to combine. The aroma at this point is just divine!
- Combine and Blend: Pour the warm cream mixture over the crumbled Christmas pudding. Use an immersion blender (or a regular blender) to blend until smooth. You want a nice, even consistency. Be careful not to over-blend, as this can make the mixture too thick.
- Chill Thoroughly: Cover the mixture and refrigerate for at least 4 hours, or preferably overnight. This allows the flavours to meld together and the mixture to cool completely. This step is crucial for getting a smooth ice cream texture.
- Churn the Ice Cream: Pour the chilled mixture into your ice cream maker and churn according to the manufacturer’s instructions. This usually takes about 20-30 minutes. You’ll know it’s ready when it has a soft-serve consistency.
- Freeze and Enjoy: Transfer the churned ice cream to a freezer-safe container and freeze for at least 2 hours to harden. This will give it a scoopable texture. Scoop and serve!