
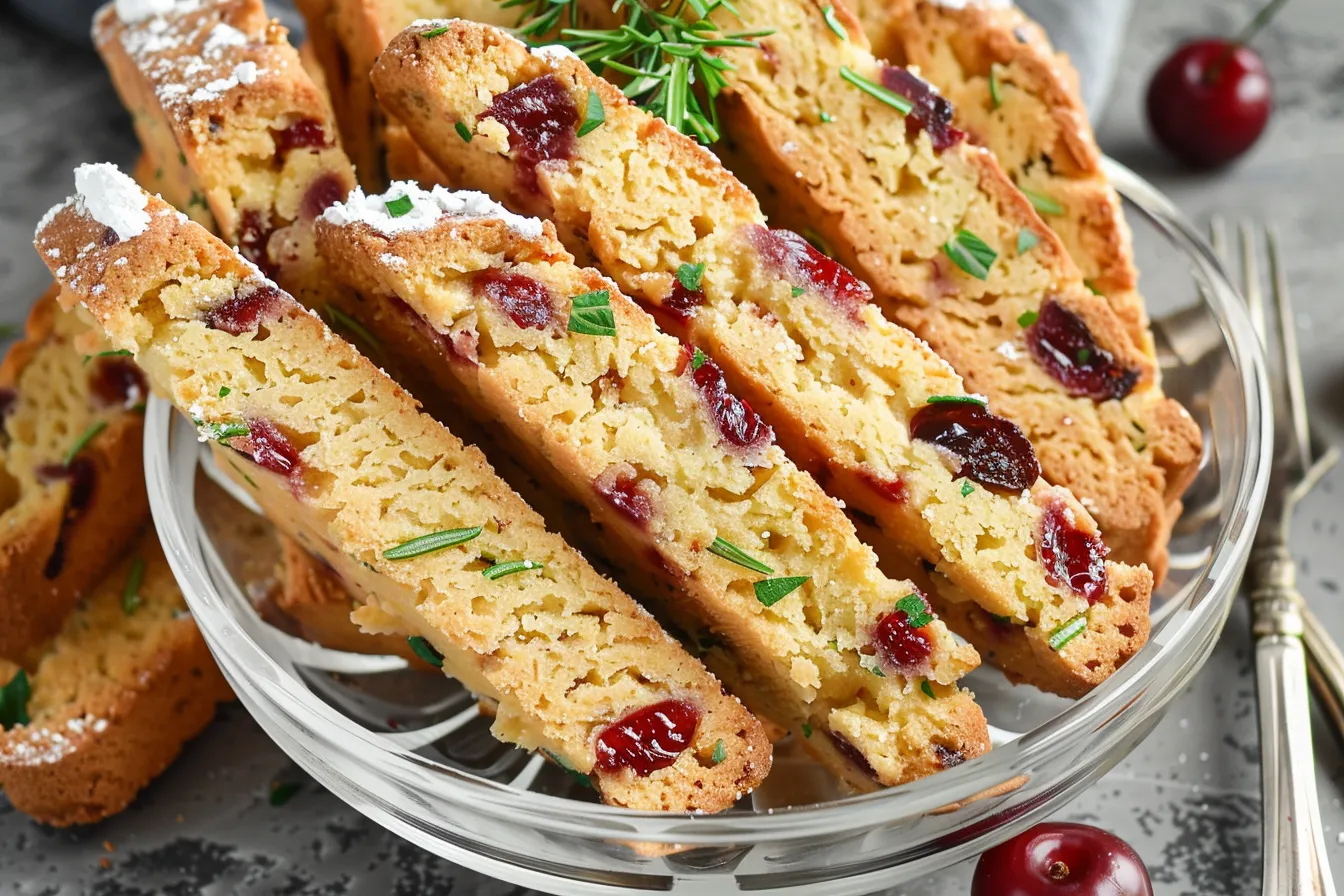
There’s something incredibly comforting about the smell of baking biscotti wafting through the house, especially on a chilly autumn afternoon. I’ve been tweaking this candied cherry biscotti recipe for what feels like forever, trying to get that perfect balance of crunchy texture and sweet, fruity flavour. After countless attempts (and a lot of honest feedback from my two little critics!), I think I’ve finally nailed it. This biscotti is utterly scrumptious dunked in a cup of tea or coffee – a proper treat to enjoy after the school run or on a rainy weekend. Get ready for a delightful bake that even the fussiest eaters will love!
Why This Recipe Works
As a busy mum, I’m always on the lookout for recipes that are both delicious and practical. This candied cherry biscotti recipe ticks all the boxes. With 8+ years of experience in the kitchen, I’ve learned a thing or two about creating fuss-free bakes that the whole family enjoys.
- Straightforward Method: No fancy techniques or complicated steps. Just simple baking at its finest.
- Child-Approved: My children absolutely adore these biscotti, which is a huge win in my book!
- Perfect for Gifting: These biscotti are perfect for giving as a gift. Especially if you are like me and love to bake during the festive season.
Ingredients
- 225g plain flour, plus extra for dusting
- 1 tsp baking powder
- Pinch of salt
- 115g caster sugar
- 55g unsalted butter, softened
- 2 large eggs
- 1 tsp vanilla extract
- 115g candied cherries, roughly chopped
- 2 tbsp milk, for brushing
- 2 tbsp Demerara sugar, for sprinkling
Ingredient Notes
Candied Cherries: These are essential for that lovely sweet and chewy texture, but dried cranberries make a good substitute if you can’t find them. Most supermarkets in the UK stock candied cherries in the baking aisle.
Caster Sugar: Caster sugar is best for this recipe as it dissolves easily. If you only have granulated sugar, you can use it, but the biscotti might be slightly grainier.
Vanilla Extract: Adds a wonderful depth of flavour. Don’t skimp on it!
Step-by-Step Instructions
Step 1: Preheat your oven to 180°C (160°C fan/Gas Mark 4). Line a baking tray with baking parchment.
Step 2: In a large bowl, whisk together the flour, baking powder, and salt. This ensures everything is evenly distributed and helps the biscotti rise properly.
Step 3: In a separate bowl, cream together the caster sugar and softened butter until light and fluffy. I use an electric mixer for this, but you can also do it by hand.
Step 4: Beat in the eggs one at a time, followed by the vanilla extract. Make sure each egg is fully incorporated before adding the next.
Step 5: Gradually add the dry ingredients to the wet ingredients, mixing until just combined. Be careful not to overmix, as this can make the biscotti tough.
Step 6: Gently fold in the chopped candied cherries. I find this is easiest to do with a spatula to avoid crushing the cherries.
Step 7: Turn the dough out onto a lightly floured surface and shape it into a log about 20cm long and 7cm wide. Place the log onto the prepared baking tray.
Step 8: Brush the top of the log with milk and sprinkle with Demerara sugar. This gives the biscotti a lovely golden crust.
Step 9: Bake for 25-30 minutes, or until the log is lightly golden and firm to the touch. Let it cool on the baking tray for 10 minutes.
Step 10: Carefully transfer the log to a cutting board and use a serrated knife to slice it into 1.5cm thick slices. If the log is still a bit soft, don’t worry – it will firm up as it cools.
Step 11: Arrange the slices cut-side up on the baking tray and bake for another 10-12 minutes on each side, or until golden brown and crisp. This second bake is what gives biscotti its signature crunch.
Step 12: Let the biscotti cool completely on a wire rack before storing. This is the hardest part because the smell is so tempting!
My Kitchen Tips & Tricks
- Don’t Overmix: Overmixing the dough can lead to tough biscotti. Mix until just combined.
- Use a Serrated Knife: A serrated knife is essential for slicing the baked log without crumbling it.
- Cool Completely: Make sure the biscotti are completely cool before storing to prevent them from becoming soft.
- Adjust Baking Time: Baking times may vary depending on your oven. Keep an eye on the biscotti and adjust the time as needed.
- Make-Ahead Tip: You can bake the log the day before and slice and bake the biscotti the next day. This is a great time-saver for busy mums.
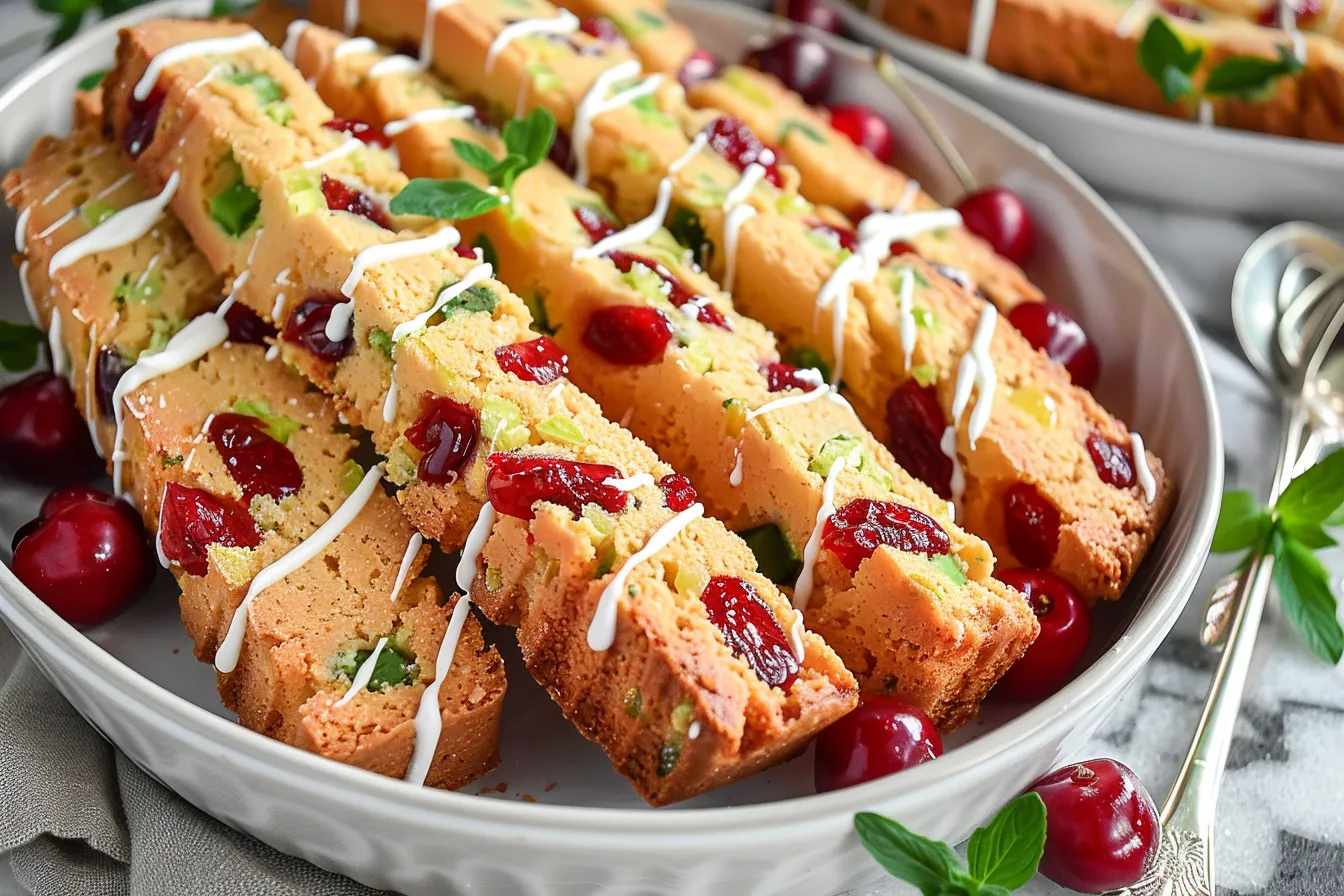
- Child-Friendly Adjustment: My children love these with a drizzle of melted chocolate. It’s a fun way to get them involved in the baking process!
- If your cherries are really sticky, try dusting them with a little flour before adding them to the dough. This helps to prevent them from clumping together.
Storage & Meal Prep
Storage: Store the cooled biscotti in an airtight container at room temperature. They will keep for up to 2 weeks (if they last that long!).
Make-Ahead: You can prepare the dough up to 24 hours in advance and store it in the fridge. Bring it to room temperature for about 30 minutes before shaping and baking.
Batch Cooking: This recipe is easily doubled or tripled for batch cooking. Biscotti make a lovely homemade gift during the holidays.
Substitutions & Variations
Gluten-Free: I haven’t tried this recipe with gluten-free flour, but a good quality gluten-free all-purpose blend should work well. Just be sure to add a little extra xanthan gum to help bind the dough.
Dairy-Free: You can substitute the butter with a dairy-free alternative, such as coconut oil or margarine.
Nutty Variation: Add 50g of chopped almonds or pistachios for a lovely nutty flavour. My family love this variation, especially around Christmas time.
Frequently Asked Questions
Can I prepare this the night before?
Absolutely. In fact, I often do this on Sunday evenings before the busy school week. Simply prepare everything up to the baking stage, cover tightly, and refrigerate. Bring it to room temperature for 15 minutes before cooking, and you’ll save yourself precious morning time.
How do I know when the biscotti are done?
The biscotti should be golden brown and crisp to the touch. They will continue to harden as they cool, so don’t worry if they seem a little soft when they come out of the oven.
Can I use different dried fruit?
Yes, you can definitely experiment with different dried fruits. Cranberries, apricots, or even raisins would all work well in this recipe. Just make sure to chop them into small pieces.
How should I store leftover biscotti?
Store the cooled biscotti in an airtight container at room temperature. This will help to keep them crisp and prevent them from becoming stale.
Do children typically enjoy this recipe?
Yes! In my experience, children absolutely love these biscotti. The sweet cherries and crunchy texture are a big hit. However, every child is different, so it’s always best to start with a small portion.
Can I scale this recipe for a larger group?
Absolutely! This recipe is easily doubled or tripled to feed a larger crowd. Just make sure to adjust the baking time accordingly.
What if my dough is too sticky?
If your dough is too sticky to handle, try adding a little extra flour, one tablespoon at a time, until it comes together. You can also chill the dough in the fridge for 30 minutes to make it easier to work with.
Serving Suggestions
These candied cherry biscotti are delicious served with a cup of tea or coffee. They also make a lovely addition to a cheese board or dessert platter.
For a simple presentation, arrange the biscotti on a pretty plate and dust with a little icing sugar. You can also tie them up with a ribbon for a homemade gift.
A serving size of 2-3 biscotti per person is usually sufficient. My family enjoys these with a scoop of vanilla ice cream or a dollop of whipped cream.
They are delicious on their own, but dipping them in Vin Santo makes them something really special.
There you have it – my tried and tested candied cherry biscotti recipe! I hope you’ll give it a go and discover just how easy (and utterly delicious) it is to make these delightful treats at home. Remember, don’t be afraid to tweak the recipe to suit your own tastes – that’s the beauty of home cooking! I have no doubt this recipe will soon become a staple bake in your home. I know it is in mine!
Happy baking, and please do share your honest feedback in the comments below. I love hearing about your baking adventures. For more family-friendly recipes and kitchen wisdom, be sure to visit FamiliesRecipes.com and join our email community. Until next time, happy baking!
PrintCandied Cherry Biscotti Easy Recipe

Craving candied cherry biscotti This easy recipe delivers irresistible flavor Bake delicious biscotti using this simple tech Enjoy cherry goodness
- Prep Time: 15 minutes
- Cook Time: 42 minutes
- Total Time: 57 minutes
- Yield: Approximately 24 biscotti
- Category: Dessert
- Cuisine: Italian
Ingredients
- 225g plain flour, plus extra for dusting
- 1 tsp baking powder
- Pinch of salt
- 115g caster sugar
- 55g unsalted butter, softened
- 2 large eggs
- 1 tsp vanilla extract
- 115g candied cherries, roughly chopped
- 2 tbsp milk, for brushing
- 2 tbsp Demerara sugar, for sprinkling
Instructions
- Preheat your oven to 180°C (160°C fan/Gas Mark 4). Line a baking tray with baking parchment.
- In a large bowl, whisk together the flour, baking powder, and salt. This ensures everything is evenly distributed and helps the biscotti rise properly.
- In a separate bowl, cream together the caster sugar and softened butter until light and fluffy. I use an electric mixer for this, but you can also do it by hand.
- Beat in the eggs one at a time, followed by the vanilla extract. Make sure each egg is fully incorporated before adding the next.
- Gradually add the dry ingredients to the wet ingredients, mixing until just combined. Be careful not to overmix, as this can make the biscotti tough.
- Gently fold in the chopped candied cherries. I find this is easiest to do with a spatula to avoid crushing the cherries.
- Turn the dough out onto a lightly floured surface and shape it into a log about 20cm long and 7cm wide. Place the log onto the prepared baking tray.
- Brush the top of the log with milk and sprinkle with Demerara sugar. This gives the biscotti a lovely golden crust.
- Bake for 25-30 minutes, or until the log is lightly golden and firm to the touch. Let it cool on the baking tray for 10 minutes.
- Carefully transfer the log to a cutting board and use a serrated knife to slice it into 1.5cm thick slices. If the log is still a bit soft, don’t worry – it will firm up as it cools.
- Arrange the slices cut-side up on the baking tray and bake for another 10-12 minutes on each side, or until golden brown and crisp. This second bake is what gives biscotti its signature crunch.
- Let the biscotti cool completely on a wire rack before storing. This is the hardest part because the smell is so tempting!
Notes
Delight in homemade candied cherry biscotti! This easy recipe is perfect for busy families. Get tips, tricks, and variations from an English mum!