
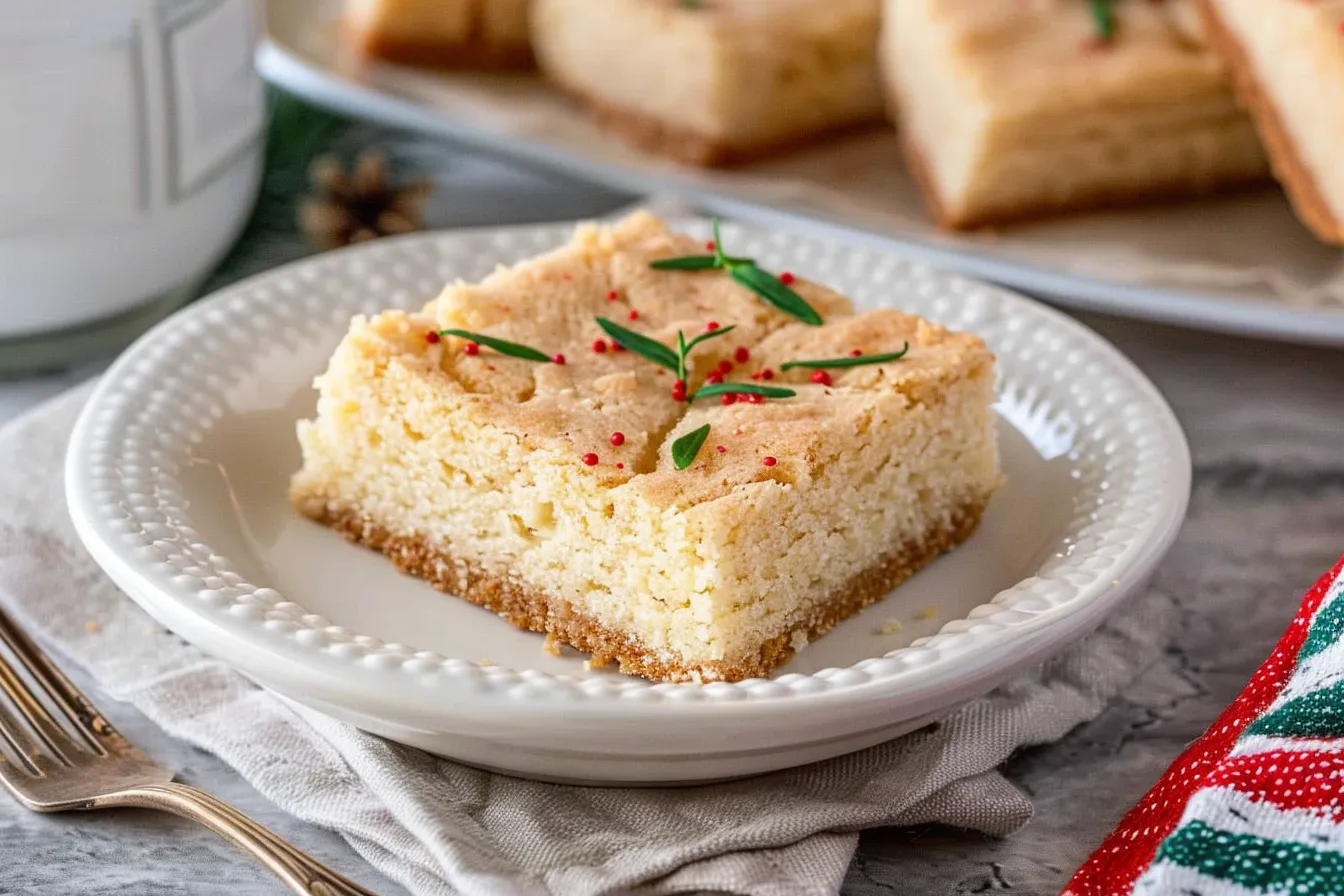
It wouldn’t be Christmas in our house without sugar cookies, now, would it? For years, I’ve carefully cut out Santas and snowmen, painstakingly decorating each one with royal icing. But let’s be honest, with two little ones underfoot during the festive season, time is precious! That’s why I started making these Christmas Sugar Cookie Bars. All the deliciousness of a classic sugar cookie, but in a fraction of the time. The kids absolutely adore decorating them (and gobbling them up, of course!). I promise, these bars will bring a touch of festive cheer to your kitchen without all the fuss.

Why This Recipe Works
After years of experimenting, I’ve landed on a method that delivers perfectly soft and chewy Christmas Sugar Cookie Bars every time. Here’s what makes this recipe a winner for busy families:
- Speed & Simplicity: Forget rolling and cutting! This recipe comes together in one bowl and bakes in a single pan.
- Kid-Approved: The blank canvas of the bars is perfect for little hands to decorate with sprinkles, frosting, and sweets. My two give it a thumbs up every year.
- Freezer-Friendly: These bars freeze beautifully, so you can bake ahead and have a festive treat ready whenever the craving strikes.
Trust me, with over eight years of home cooking experience, I know a thing or two about creating recipes that are both delicious and practical. This one’s a keeper!
Ingredients
- 225g unsalted butter, softened
- 200g granulated sugar
- 1 large egg
- 1 teaspoon vanilla extract
- 300g plain flour
- 1 teaspoon baking powder
- 1/4 teaspoon salt
- Icing: 250g icing sugar, 3-4 tablespoons milk, food colouring (optional), sprinkles
Ingredient Notes
Butter: Unsalted butter is crucial for controlling the overall saltiness of the bars. Make sure it’s properly softened for easy creaming.
Vanilla Extract: Don’t skimp on the vanilla! It adds a lovely warmth to the flavour. You can substitute with vanilla essence if that’s what you have to hand, but the extract is superior, in my opinion.
Plain Flour: Also known as all-purpose flour. Self-raising flour will result in a cake-like texture, so stick with plain.
Icing Sugar: Also known as confectioners’ sugar or powdered sugar.
Step-by-Step Instructions
Step 1: Preheat your oven to 180°C (160°C fan/Gas Mark 4). Grease and line a 9×13 inch (23x33cm) baking tin with baking parchment, leaving an overhang for easy removal.
Step 2: In a large bowl, cream together the softened butter and granulated sugar until light and fluffy. This usually takes about 3-5 minutes with an electric mixer. You want it to be pale and smooth.
Step 3: Beat in the egg and vanilla extract until well combined. Scrape down the sides of the bowl to ensure everything is evenly mixed.
Step 4: In a separate bowl, whisk together the plain flour, baking powder, and salt. This helps to distribute the baking powder evenly throughout the flour, resulting in a more consistent bake.
Step 5: Gradually add the dry ingredients to the wet ingredients, mixing on low speed until just combined. Be careful not to overmix; a slightly lumpy batter is perfectly fine.
Step 6: Press the dough evenly into the prepared baking tin. I find using the back of a spoon or my fingertips works best.
Step 7: Bake for 20-25 minutes, or until the edges are lightly golden brown and a toothpick inserted into the centre comes out clean. The centre should be set, but still slightly soft.
Step 8: Let the bars cool completely in the tin before lifting them out using the parchment paper overhang. This will prevent them from breaking.
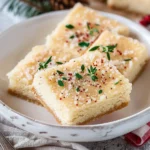
Step 9: While the bars are cooling, prepare your icing. In a bowl, whisk together the icing sugar and milk until you reach a smooth, spreadable consistency. Add more milk, a teaspoon at a time, if the icing is too thick.
Step 10: Add a few drops of food colouring to your icing if desired. We usually have a few different colours, so the kids can get creative! Spread the icing evenly over the cooled cookie bars and decorate with sprinkles.
Step 11: Cut the bars into squares and serve. Enjoy!
My Kitchen Tips & Tricks
- Soft Butter is Key: Make sure your butter is properly softened, but not melted. If it’s too warm, the bars will spread too much during baking.
- Don’t Overmix: Overmixing the dough can result in tough bars. Mix until just combined, and don’t worry about a few lumps.
- Lining the Tin: Using baking parchment with an overhang makes it so easy to lift the bars out of the tin without breaking them. Trust me; it’s worth the effort!
- Cool Completely: Let the bars cool completely before icing them. Otherwise, the icing will melt and run.
- Kid-Friendly Decorating: Set out a variety of sprinkles, sweets, and coloured icing, and let the kids go wild! It’s a great way to get them involved in the kitchen. My youngest has a particular fondness for edible glitter…
- Make-Ahead Tip: The uniced bars can be baked a day ahead and stored in an airtight container at room temperature. Ice them just before serving.
- Troubleshooting: If your bars are browning too quickly, tent the tin with foil during the last few minutes of baking.
Storage & Meal Prep
These Christmas Sugar Cookie Bars store beautifully! Once iced and cut, they can be kept in an airtight container at room temperature for up to 3 days. For longer storage, you can freeze them for up to 2 months. Thaw them completely at room temperature before serving.
For meal prep, you can bake the bars ahead of time and freeze them un-iced. When you’re ready to serve, simply thaw, ice, and decorate. They’re also great for batch cooking – double or triple the recipe and freeze the extras for future treats.
Substitutions & Variations
Whilst I haven’t tested all possible substitutions, here are some ideas that I think would work well:
- Gluten-Free: Use a gluten-free all-purpose flour blend, ensuring it contains xanthan gum for binding.
- Dairy-Free: Substitute the butter with a dairy-free baking block. Use a plant-based milk for the icing.
- Lemon Zest: Add a tablespoon of lemon zest to the dough for a zesty twist. This works particularly well at Easter!
- Different Extracts: Experiment with other extracts, such as almond or peppermint, for a unique flavour profile.
- Seasonal Sprinkles: Change up the sprinkles to match the season or holiday. Think autumn leaves, Halloween ghosts, or springtime flowers.
Frequently Asked Questions
Can I prepare this the night before?
Absolutely. In fact, I often bake the bars the night before and ice them in the morning. Simply store the baked bars in an airtight container at room temperature. This saves you time when you need a quick and easy treat.
How do I know when the bars are done?
The edges should be lightly golden brown, and a toothpick inserted into the centre should come out clean or with just a few moist crumbs attached. Be careful not to overbake, as this can make the bars dry.
Can I substitute the granulated sugar with brown sugar?
I wouldn’t recommend it, as brown sugar will change the texture and flavour of the bars, making them softer and more caramel-like. For classic Christmas Sugar Cookie Bars, stick with granulated sugar.
How do I store the leftover bars properly?
Store the iced bars in an airtight container at room temperature for up to 3 days or in the freezer for up to 2 months.
Do children typically enjoy this recipe?
Oh yes! My two absolutely love decorating and eating these bars. They are a firm family favourite, especially around Christmas time.
Can I scale this recipe for a larger or smaller family?
Yes, you can easily scale this recipe. Simply double or halve all the ingredients to suit your needs. If using a different size tin, you may need to adjust the baking time accordingly.
Serving Suggestions
These Christmas Sugar Cookie Bars are perfect on their own with a cup of tea or coffee. They also pair well with a glass of milk or a scoop of vanilla ice cream. For a festive touch, serve them on a pretty plate with a sprinkle of icing sugar or a few fresh berries.
My family loves to enjoy them after our Christmas dinner or as a sweet treat during a cosy evening by the fire. They’re also a great addition to a Christmas cookie exchange or a homemade gift for friends and neighbours.
I usually cut each bar into about 12 squares, making them perfect for little hands. Feel free to cut them into smaller or larger pieces depending on your preference.
So there you have it! My go-to recipe for Christmas Sugar Cookie Bars. It is so quick and easy that even with the whirlwind of Christmas you will still find the time to bake them with family.
Do give them a try, I’m sure the kids will love them.
Happy Baking
Jessica
PrintChristmas Cookie Bars Recipe
Easy Xmas cookie bars recipe Delicious dessert Make this simple Christmas treat Baking tech tips inside Perfect holiday cookies 144 chars
- Prep Time: 15 minutes
- Cook Time: 25 minutes
- Total Time: 40 minutes
- Yield: 12 servings
- Category: Dessert
- Cuisine: American
Ingredients
- 225 grams unsalted butter, softened
- 200 grams granulated sugar
- 1 large egg
- 1 teaspoon vanilla extract
- 300 grams plain flour
- 1 teaspoon baking powder
- 1/4 teaspoon salt
- 250 grams icing sugar
- 3–4 tablespoons milk
- food colouring (optional)
- sprinkles
Instructions
- Preheat your oven to 180°C (160°C fan/Gas Mark 4). Grease and line a 9×13 inch (23x33cm) baking tin with baking parchment, leaving an overhang for easy removal.
- In a large bowl, cream together the softened butter and granulated sugar until light and fluffy. This usually takes about 3-5 minutes with an electric mixer. You want it to be pale and smooth.
- Beat in the egg and vanilla extract until well combined. Scrape down the sides of the bowl to ensure everything is evenly mixed.
- In a separate bowl, whisk together the plain flour, baking powder, and salt. This helps to distribute the baking powder evenly throughout the flour, resulting in a more consistent bake.
- Gradually add the dry ingredients to the wet ingredients, mixing on low speed until just combined. Be careful not to overmix; a slightly lumpy batter is perfectly fine.
- Press the dough evenly into the prepared baking tin. I find using the back of a spoon or my fingertips works best.
- Bake for 20-25 minutes, or until the edges are lightly golden brown and a toothpick inserted into the centre comes out clean. The centre should be set, but still slightly soft.
- Let the bars cool completely in the tin before lifting them out using the parchment paper overhang. This will prevent them from breaking.
- While the bars are cooling, prepare your icing. In a bowl, whisk together the icing sugar and milk until you reach a smooth, spreadable consistency. Add more milk, a teaspoon at a time, if the icing is too thick.
- Add a few drops of food colouring to your icing if desired. We usually have a few different colours, so the kids can get creative! Spread the icing evenly over the cooled cookie bars and decorate with sprinkles.
- Cut the bars into squares and serve. Enjoy!
Notes
Quick & easy Christmas Sugar Cookie Bars recipe! Bake in one pan, decorate with the kids & enjoy festive treats without the fuss. A family favourite.